
In part one I covered the key features to look for in an echo sounder designed for predator fishing and how much you should be looking to pay. This time I am going to move on to looking at how I set up my sounder to give a clear image of what is going on below the surface.
PORTABILITY
With a few exceptions, most echo sounders are designed to be fixed permanently to a single boat. This is great if like our American and European cousins you fish from your own boat all the time, but as most of us in the UK use hire boats for much of our fishing this isn’t of great use to us. Fortunately, there is nothing to stop you setting up any sounder so that it can be used on multiple boats with no trouble at all.
First off you are going to need a battery. Mine is a 12 volt, 40amp hour job that will run a big screen sounder for the best part of two days. It is worth remembering if you are up-sizing from a smaller unit that big screens often need a lot more juice than smaller ones. My battery connectors are permanently bolted to the battery, meaning that I just screw the quick-release connector on the end of the cable into the back of the sounder and I have power. Permanent fixtures are a good idea, giving a good connection and little risk of the power dropping out and potentially damaging the unit.
There are often some spare cables for connecting networks and switches on many sounder cables. These I blank off by putting a length of shrink tube over the end of the wire leaving at least 3cm of tube beyond the wire. I then fold the shrink tube over on itself and shrink another length of tubing over the whole lot to seal the bent-over tubing in place. Simple, and very waterproof.
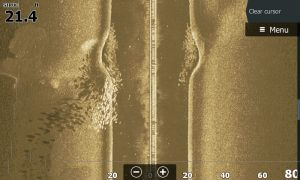
A huge shoal of perch fry.
I would strongly advise keeping the sounder head in a protective case, such as those made by Peli, when not in use. A small point, but it is also worth carrying a bungee strap with you so that the sounder can be strapped to the boat seat when in use. The amount of times mine has nearly fallen off the seat, with potentially expensive consequences, when motoring about are too many to count.
Finally, you will need to have brackets for the tranducer(s). The metal ones made by companies such as Amiaud peche are fine, but the Minn Kota one is so much better. If you are running two transducers (standard and side-imaging) then the cost of buying two cheaper brackets is actually not much different to buying the best one. The reason the Min Kota bracket is so much better is that it allows you to clamp the transducers anywhere on the boat because it has twin clamps and a very strong composite shaft. In most cases bolting the transducers close together and at the same height is a good idea so that they are looking at the same bit of water.
Most people put the bracket on the transom, right next to the engine and expect a complex piece of equipment to work perfectly when exposed to the vibration and cavitation in the water caused by the engine. Believe me, you will get a lot more from your sounder if you can get those transducers away from the engine by a couple of feet or more and this normally means mounting them on the side of the boat. Most boat engines are set up to be driven with the left hand, so it makes sense to put the sounder and transducer on this side of the boat.
With my Lowrance sounders the tranducers need to be orientated in the direction of travel. This might sound like an obvious point, but if you decide to fish on the drift, rather than on the engine, then the trannie will need to be twisted through 90 degrees so that they are still lined up in the right direction.
With everything locked down solid and connected up we can now power up the sounder and actually start looking at some fun stuff! To start with lets just look at the standard down-looking sonar and see what this shows us.
THE STANDARD VIEW
From £100 sounders upwards you will probably have standard down-viewing sonar on your unit. It might be old-hat, but this is still very often the most important information that your sounder can give you, so it is important to make sure that it is set up right.
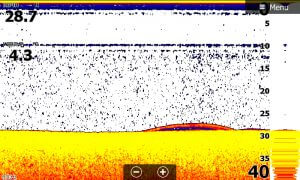
Straight out of the box you should see the bottom displayed as a solid line and perhaps some interference that looks like snow up in the water. Try adjusting the sensitivity to see how it effects the interference. I like to have my screen set so that there is just a little bit of speckling, but not so much that it becomes overpowering. The point to remember is that the higher the sensitivity the better you will see fish and structure, so this adjustment is a bit of a balancing-act. You might find that you need to adjust the sensitivity during the day. This is often the case if you start fishing the windward bank where more algae and sediment will be in the water, because this is what is causing the interference.
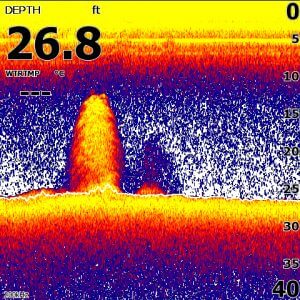
A classic fish arch.
Before we set-sail check that the ping speed and screen rate are both set to about three quarters of the maximum. These settings control how often the screen is refreshed and how fast the image scrolls across the screen. With these set quite high you get only a small lag between passing over something and it appearing on the screen.
Take the boat for a little potter about and you will probably see the bottom start to move up and down as the depth under the boat changes. Remember though that what you are seeing on the screen is not an exact representation of what the bottom looks like from left to right, all you are seeing is the change as the boat moves. So if you move around quickly often depth changes will happen rapidly and look like a proper drop-off. Do the same thing more slowly and it will look like a gentle slope.
The thickness and colour of the bottom might also change. Exactly what you see will depend upon the sounder that you have, but it is important to learn how to interpret this information. This reflects the bottom hardness, which can be an important fish-finding feature on some venues, with harder areas of lake bed often proving to be more productive in my experience.
a shoal of large bait fish.
You will see a lot of different features, including weedbeds, which appear as a fuzzy bottom (!) using this standard view. The more you go out and look at the venue the more you will learn, and slowly a mental map of the layout will start to form. The chances are that what you imagine bears little resemblance to what is actually going on, but so what? Your interpretation and over time the types of areas where you tend to catch fish will start to come together.
FISH!
Sooner or later you will come across something in the water and a Fish-ID symbol will come up on the screen. Unfortunately, even the best units cannot tell the difference between a strand of weed, an air bubble, or a roach, so Fish-ID is rarely accurate. So lets turn it off and see what we get instead.
If it is a fish then typically you will see an arch or an upside down tick-shape. These arches are caused by the sound emitted by the transducer bouncing off the swimbladder and soft tissues of the fish. The bigger the arch very often the bigger the fish, although bear in mind that at depth arches will often be smaller than in shallow water, both because the screen has to pack in more depth, but also because the fish are further away from the transducer. You can overcome this by using the screen magnification feature. I normally magnify the screen to give me about 10-15ft of water (normally tracking the bottom) irrespective of the depth of water I am over, so that I have a more-or-less constant scale.
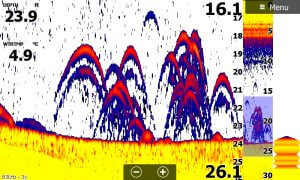
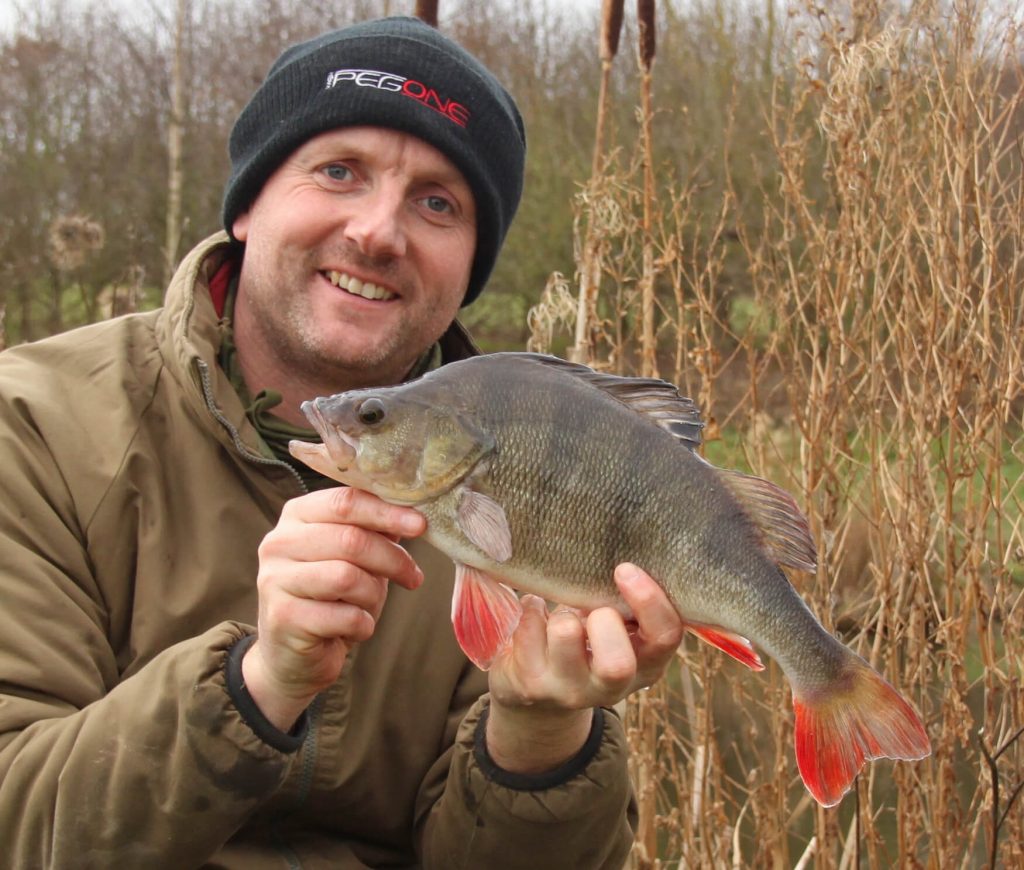
Big perch will often form stacks.
It is a common misnomer to believe that an arch is showing the top-half of the swimbladder. If this were the case then how could we explain that some of the arches are more than three feet high? What we are seeing is more interesting, and perhaps more useful than that and explains how the sonar actually works.
All sonars work by emitting high frequency sound waves via a small vibrating crystal in the transducer. When these sound waves hit the bottom, or something in the water, they are reflected back and some of this reflected sound will be picked-up by the transducer. The clever electronics work out the strength of the return and its distance from the transducer and convert this into one vertical line of the picture you see on the screen. As time goes by the sounder stacks each return signal next to the last, creating a scrolling image.
As the boat moves towards an object in the water it gets closer to the transducer even though its depth hasn’t changed, this produces the leading edge of the arch. When it is at its closest point it reaches the top of the arch and then as the boat starts to move away the distance increases once again, forming the trailing-side of the arch. So the best estimate that we can actually get of the depth of the fish is the peak of the arch. This all presumes that the fish is directly under the boat and not moving. If either of these assumptions are not true then the shape of the arch will not be symmetrical and you will get an upside down tick shape instead.
You will also notice that the strength of the signal increases as the arch reaches its peak. Standard on Lowrance units is a shift from blue, through red, to yellow for the strongest signal. If the arch is blue then the fish is likely to be to the side of the boat, but if it changes to yellow then it is right under the boat.
How far a fish or an object is from the boat is dependent upon the water depth and the frequency of the sonar beam. If you think of the sound waves spreading out as they descend in a roughly conical shape then you will see why objects can be some distance from the boat. For the common 83kHz transducer you get roughly a foot of spread for every foot of depth. This is fine for shallow water, but isn’t going to show fine detail. Switching to 200kHz roughly halves the cone spread, giving you a more precise image.
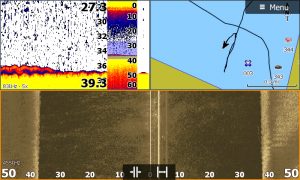
I normally set my screen up with three panels.
The last paragraph has loads of implications. For instance, the sounder can only show one depth at a time, so it averages across the whole cone, or takes the highest point. It could well miss small depressions. It also explains why fish can be seen that are all around the boat, not just right underneath it. Pelagic zander anglers talk about hunting the yellow – the peaks of the fish arches, where the signal is strongest and the fish under the transducer. They will be using 200kHz to give a precise fix on the fish, but for the rest of us 83kHz is better for getting an idea of the bottom and finding fish. Similarly, if you are fishing over deep water then use 200kHz to limit the size of the cone. If all this sounds really confusing, then don’t worry. Set the frequency to 83kHz and forget about it!
Relating the fish arches that you see on the screen to the size and species of fish that are down there takes practice. We often use Waterwolf cameras to see what the fish are and the results have been quite enlightening. The most important thing is that we tend to overestimate the size of the fish from the arches we see. If you are seeing clouds of fish then they are likely to be very small, under 4-inches in length. Individual fish start to be seen once they get above 6-inches, this is partly because the shoals spread out a bit. Big bait fish give big arches and, with the exception of perch, will normally be in the bottom few feet of water.
You will see pike on the sounder too, but not very often. In autumn they are pretty much unmistakable though forming great big arches and giving a really strong (yellow) return. What you see depends very much on how active the fish are. Often with pike, especially in the depths of winter, all you will see is a small yellow blob on the bottom – easily mistaken for a rock. This is a fish resting up close to the deck and is a prime target for a bit of vertical jigging!
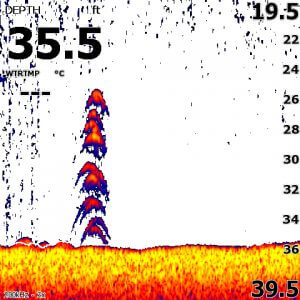
A shoal of bream sitting in a stream bed.
A little exercise that you can try is to lower a 2oz lead down under the transducer. You can follow this as it descends, but watch what happens when it gets to the bottom. Normally it will disappear within a foot of the deck. Try zooming in and you will get a better fix on it, but still it won’t be visible when it is tight to the bottom. This tight to the bottom the sounder struggles to differentiate between the bottom and any fish, giving pike (and often zander) somewhere to hide.
GPS
Fortunately, there is a lot less to be said about setting up the GPS on your sounder, even though, in the long-term, it is one of the most important parts of the whole system. The key word though is long-term, as it is important to plan how you are going to use it and stick to a system.
All GPS really does is mark points to within a few feet using satellite navigation. You can mark any spot that you want. Perhaps a change in depth, a snag, river bed, the jetty or even fish. The most important thing is that you think carefully about the symbols you use to mark each thing and stick to a system rigidly. Over time you could build up several thousand spots on various venues and trying to remember what they all mean is impossible. So cataloguing them is essential. I learnt this the hard way, noting spots, but not recording what they were, for a year before I saw the error of my ways and starting to be more accurate in my descriptions.
Most sounders will have plenty of symbols that are more or less self-explanatory, but I also add names that are meaningful. Fish weights and dates are good, and will show up patterns after a few years. Specific features can also be named if required.
I will use plain round blobs to mark interesting stuff, such as fish, that I have found that day. Doing this I know that these spots are less important and can perhaps be erased at the end of the day.
One more thing to bear in mind with GPS spots is that venues change. Water levels go up and down, weed lines move, and even mussel beds can come and go. Rather than go to spots religiously, try to bear in mind what might have changed and react accordingly – a good example of watercraft, diary keeping and technology working together.
SIDE IMAGING
I must admit I have been guilty in the past of using pictures of pike and other fish on side-imagers to make points in articles, which has probably overstated the importance of using this kit as a fish-finder compared to feature finding. I would say that for every pike that I have caught using the side imager (SI), I have probably seen another 50 that I’ve not stuck hooks in. That said, this is a very useful view of the underwater world, with a few shortcomings that you need to be aware of.
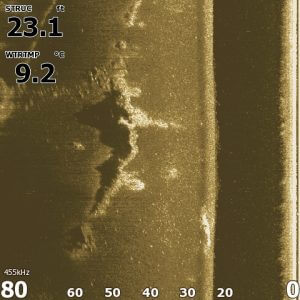
Pike are seen as white streaks.
As the name suggests, SI makes an image by looking to either side of the transducer. To get a clear image the boat has to be moving and the transducer at 90 degrees to the direction you are heading in. Sound waves are sent out sideways and collected in the same way as with a normal sonar, but the clever electronics turns this information into a two-dimensional view of the bottom. Structure can be seen very clearly, with stuff that sticks up off the bottom creating a sonar shadow on the bottom beyond it. The distance between the object and the shadow giving an idea of the height off bottom.
In terms of setting up the SI there isn’t a great deal that you can alter on most units. The tracking speed should be set to high, although you will probably find that this lags behind the down-looking sonar, I guess because of the processing power needed to produce the image. You can also alter the screen intensity, but all this is really doing is altering the gain, so it doesn’t show any more information, but does make what you can see perhaps brighter and easier to see.
The final thing that you can change is the distance either side of the boat (or one side if you prefer) that is displayed on the screen. This is the key feature and needs to be adjusted to get the best from the display.
As a rough rule of thumb, set the width to between 3 and 4 times the water depth. This will give you a clear image with a small amount of fall-off in quality towards the outer limits. So, for example, in 15 feet of water set to the width to 45 to 60 feet either side of the boat. Obviously, this is an awful lot of information to pack into a small area, so SI is best viewed on a big screen. I managed for a couple of years using just a 5-inch unit, but believe me going bigger is much more sensible if you can afford it.
SI still has some limitations though even on a big screen, in water deeper than about 40 feet structure will be shown just fine, but fish will be at best vague, I think because they are just too small to register. At the other extreme, in really shallow water you might not get much width to the scanned image.
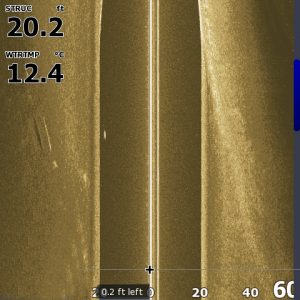
SI units are very good at showing underwater features like this ridge.
Head out on most big reservoirs and the first thing you will notice is how little you actually see on the SI. Don’t panic! This is normal, and hundreds of acres can have a featureless silty bottom. To prove that the unit is actually working drive past some known features, such as buoy ropes, towers, snags and jetties. If you still see nothing, then get the instructions out!
The image that you see on an SI can be a little confusing at first, but you soon get the hang of it. Working from the centre out, the central white line represents the position of the transducer. The dark area to the side of this is the water column heading down and outwards until it hits the bottom. The shaded grey area is then the bottom stretching away to the side. Smaller fish can often be seen as light grey blobs through the water column and spread out across the bottom. Pike tend to show up as long streaks, the slower you are moving the longer the streaks will be.
You may be wondering why it is so difficult to catch fish that have been spotted on the SI. I think that a number of factors come into play, which mean that rarely are the fish where you think they are. Firstly, there is the lag in the fish appearing on the screen and the boat having past it. This can mean that the fish is a long way behind you before you realise it is there. To overcome this you can always mark the fish with a GPS spot and then recover the same spot.
Of course, fish generally aren’t sitting still waiting for us to cast at them. A moving fish can be some distance away before you have spotted it. I also believe that a lot of fish that are seen on the SI when lure fishing have either already followed or have shown no interest in the bait. Casting at them with the same lure will more than likely result in the same level of disinterest.
And one final thing. SI images see fish best when they are up in the water column and may well completely miss fish sat tight on the bottom. I can think of a few instances where I have seen nothing on the SI and just a few vague blobs on the standard sonar, but have caught plenty of pike dragging lures along the bottom.
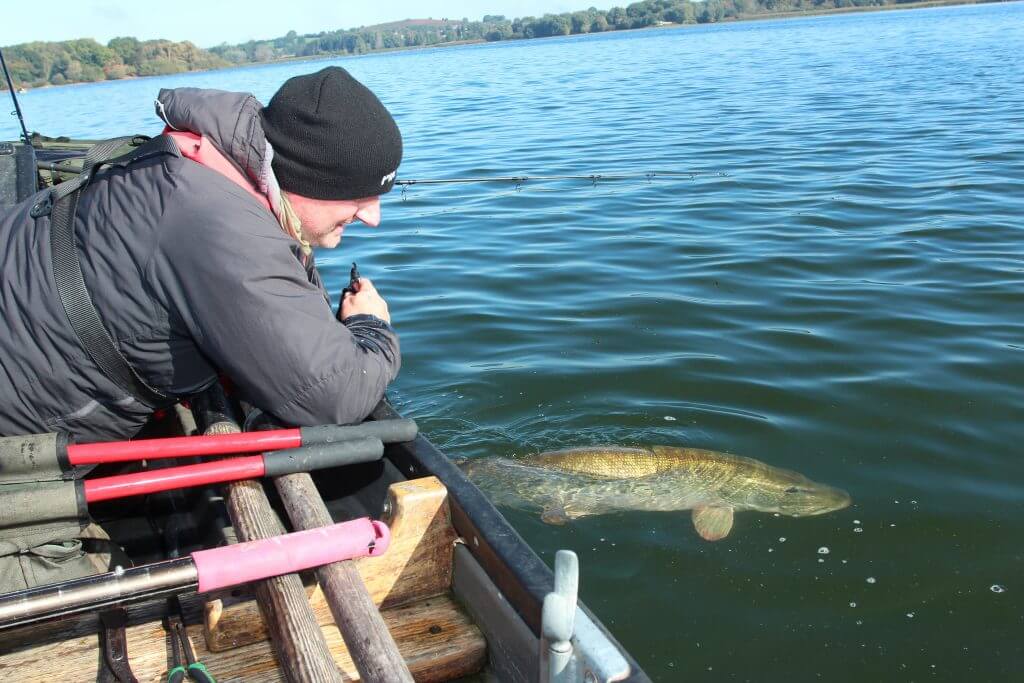
A resting pike. Very easy to overlook.
All sonar types really struggle spotting fish amongst weed too. Take a day at Chew last October when we knew the pike were stacked up in a large area of weed. A lot of fish had been caught here the previous week, but when my buddy went over it the day before bait fishing recommenced he didn’t see a single pike. He didn’t raise any on the fly either. The following day that area produced a LOT of pike, including some thirties. You can’t tell me that those fish just happened to not be there when he was fly fishing. They were simply sitting in the weed and effectively hidden from the sounder.
So there you have it. Sounders in all their various incarnations can be incredibly useful bits of kit, but are far from infallible and much comes down to the skill and interpretation of the user. There are no short cuts. Expect it to take you a year or more to get the hang of using your unit. Combine this on the water view of what is going on with knowledge of the venue and watercraft and you won’t go far wrong.
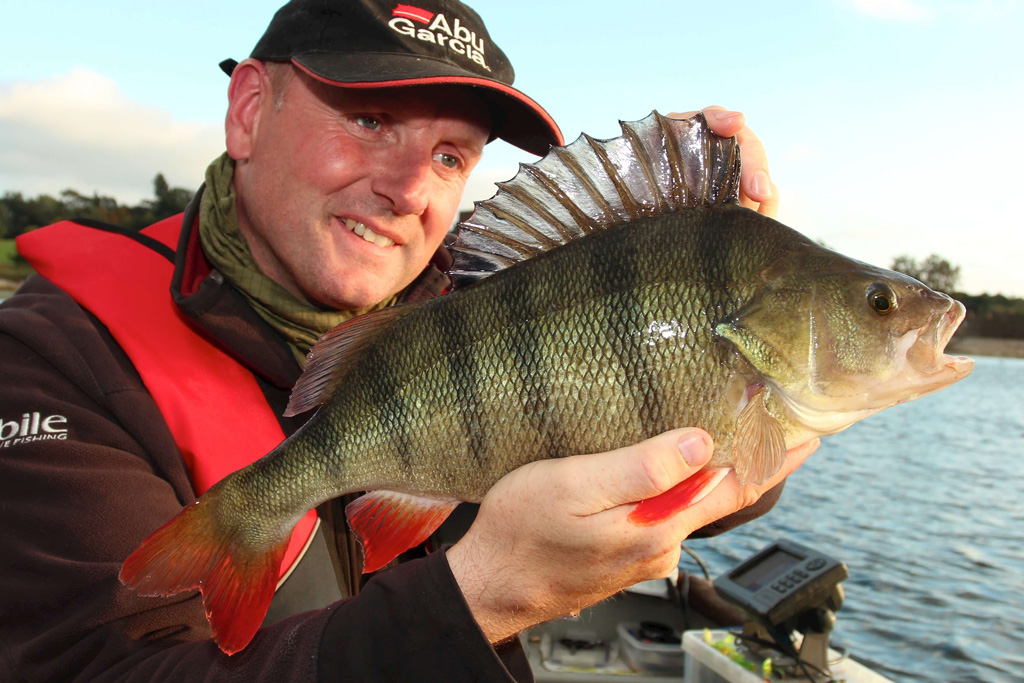
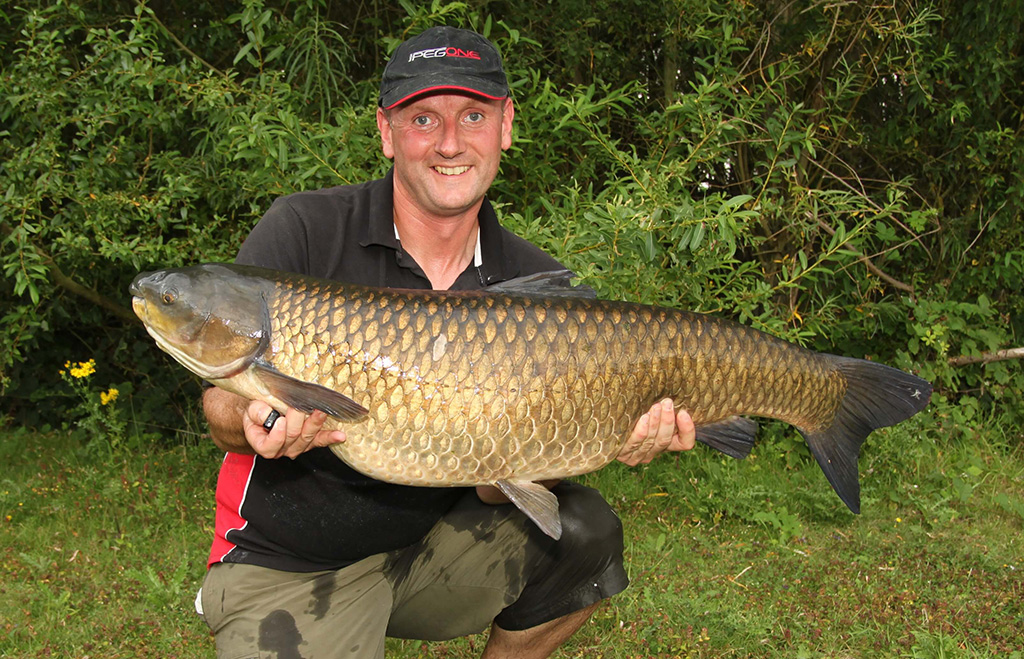
The culmination of water-craft, venue knowledge and a sounder.

No Comments